Sometimes you might have seen Windows launch updates to its existing improvements for security purposes and also for the total improvement of the interface. The updates can be downloaded and installed by the user after it gets rolled out after a certain time period. However, there are different cases when there is a failure of Windows updates to be installed in your PC and then, it reverts you back with an error. The exact reason is unknown since every update is different from the other and it targets different problems. Therefore, in this article, we have inculcated all the major issues pertaining to the feature update to Windows 10 Version 1709 failed to install issues and have also provided easy solutions for those.
Different issues pertaining to Windows 10 Version 1709 failure-
There are several issues that you may encounter while installing Windows 10 Update 1709 also termed as Fall Creators Update. Sometimes, the process for downloading gets stuck. Therefore, in this paragraph, we will give you the different causes that govern the feature update to Windows 10 version 1709 failed to install issue.
Cause 1:
When downloading of the Windows 10 Fall Creators Update Version 1709 is done, Windows will inform you to reboot the system for installing the update. After restarting the system, you will find that the Fall Creator Update installation is not done and the following error will pop up in the Update History tab “Feature Update to Windows 10 Version 1709 failed to install” with error 0x80080008.
Cause 2:
After the checking for the new update is completed, Windows will begin to download the Fall Creators Update for Windows 10 Version 1709. However, sometimes, the downloading operations get stuck with error 0x80d02002.
Instant Fix: Feature Update to Windows 10 Version 1709 Failed to Install
You guys might be very familiar with Windows Update Troubleshooter developed by Microsoft and many of you guys are aware of the issue of Feature Update to Windows 10 Version 1709 failed to install issue. It mainly analyzes the system particularly the Windows update module and other troubleshoot problems. Ensure that the troubleshooting process is done. The application analyzes all the system files, henceforth it will take some time.
Basic Steps-
- First, download Windows Update Troubleshooter from the official website.
- Navigate to that particular folder where you have downloaded it and open the file.
- When the troubleshooting begins, choose the options for Windows Update and press Next.
- After that, Windows will begin inspecting the machine. Every system file would be scanned along with registry values. Therefore, it will take much time.
- If any new version is available, Windows will give you a new edition which would be more ideal for troubleshooting purposes. Press the option “Run the Windows 10 Windows Update Troubleshooter” if it pops up.
- Then press Next.
- After the troubleshooter inspects your computer and registry values, there may be a pop up showing either Windows Update Pending or Solution is fixed or not.
- From now, Windows will apply the fix and will notify you once completed.
- Restart your P.C to check the changes that were taking place and ensure that the error message moves away.
- Click on Windows +S to launch the start menu search bar. Write “Troubleshoot” in the dialogue box provided and press the first result.
- Select Windows Update present in the troubleshoot menu and press “Run The Troubleshooter” option.
- After that, you will get a pop-up that the troubleshooter requires the access of the administrator to check different problems associated with your system. Press “Try Troubleshooting as an administrator”.
- When the implementation of the fixes is done, restart your computer and examine whether the issue is fixed or not.
However, please ensure that you have a good internet connection to get the best result. Moreover, make a try to run the troubleshooter several times instead of trying only once.
Fix 1: Running different commands-
We will make several attempts to run some commands to reset different modules and bring the P.C to the proper arrangement.
- Press Windows + S to introduce the search bar of the start menu. Write “Command Prompt”, then right click the first result and then select “Run as Administrator”.
- When you are in the command prompt, run the following commands-
- net stop bits
- ren C:\Windows\SoftwareDistribution SoftwareDistribution.old
- net stop wuauserv
- Ren C:\Windows\System32\catroot2catroot2.old
- net stop crypptsvc
- ren C:\Windows\SoftwareDistribution SoftwareDistribution.old
Also, you can follow net start bits, net start wuauservnet , start appidsvcnet, start cryptSvc commands to resolve the issue.
- Exit from the Command Prompt and reboot your computer. Please ensure if the update can be installed again or not.
Fix 2: Disable the Antivirus-
Antivirus sometimes controls your computer which includes system files to make sure if there are any potential threats in your PC. It can happen that your antivirus software is conflicting with your Windows Update and therefore, can be cited as the cause of the failure. However, make an attempt to disable your antivirus. But, if the problem still continues, ensure that you have a good internet connection and your anti-virus mode is turned off completely. You are allowed to revert the changes if it fails to work.
Fix 3: Updating the Time, Region and Language Settings-
Another unusual behavior occurs while updating the time and language settings in our P.C.
All of us are aware that Windows syncs the time as per the time zone automatically. If your P.C has an incorrect timezone it can hardly cause any problem failure of the update installation.
Easy Steps-
- Hold Windows +S to launch the search bar. Write “Settings” in the dialogue box and open it.
- Write the date and time in a correct manner. If it doesn’t happen, uncheck the option “set time automatically” and “set timezone automatically”
- Press “Change” option beneath the Change Date and Time. Set the time according to your choice and choose the appropriate time zone. Moreover, disable “Auto Sync-time”.
- Once done, press Windows+S again and write “language” in the dialogue box. Open the first search which comes forward.
- When you are in the Language Settings, use English United Kingdom/US.
- Press “Additional time, date & regional settings”.
- Thereafter, you will get redirected to a different window containing the same settings. Click them serially and inspect whether the settings match the same like you have set before.
- Once you make the changes, exit from all your windows and restart your PC. Now, examine whether the problem continues or not.
Fix 4: Disconnect from Internet Before Updating-
There is another solution which is very much useful to some of the users such as disconnecting the internet before updating the Operating System to the recent version. However, there are some bugs which you can face when there is a break in the internet connection.
Basic Steps-
- Press the network icon available at the bottom right side of the screen.
- If your PC has connection to a particular WiFi, you will see a WiFi icon otherwise if your P.C has an Ethernet connection, there will be a different icon. Therefore, if you have a WiFi connection, just press Airplane Mode once and your internet connection will get disabled. However, in case of Ethernet, disconnect the cable from your computer.
- Therefore you can go ahead with the update. However, it will not create any interruptions.
Fix 5: Connect the Router with the help of Ethernet and installation using Microsoft Website-
Another fix can be linking your router directly by plugging the Ethernet cable and installation of the Windows update with the help of Microsoft Website in place of the normal client-server available on the computer. There can be a defect in relation to internet access between the client and the server. However, to resolve this problem follow the below steps-
Easy Steps-
- Connect the computer to the router with the help of Ethernet wire. Then, you can enter your computer into Clean Boot State.
- Click Windows+R to start the Run application. Also write “misconfig” in the dialogue box present and click Enter.
- Move to the Services tab available at the top of the screen. Examine the line “Hide All Microsoft Services”. Once you press this icon, all the Microsoft related services will get disabled.
- Press “Disable All” button present at the left side of the Window.
- Then, press “Apply” to save the unsaved changes and then, press Exit.
- Now, move to the Startup Tab and press “Open Task Manager”. Then, you can automatically get move to the Task Manager page where you will get all the applications when the computer starts will be listed.
- Choose each of the services serially and press “Disable” present at the bottom right side of the window.
- After that restart your PC and after booting, open the web browser and open the following page
https://www.microsoft.com/en-us/software-download/windows10.
- Here will find an Update Now button available at the top, then you press on it to download the follow the on-screen instructions for the update assistant installation.
After the installation, Windows will begin to update. This might take a few hours, don’t panic and wait till the process ends.
However, make a note that this Update option might get disabled after some time if they thought of changing it or if any new update is available.
Fix 6: Uninstall the WiFi Driver-
Another solution for the Windows 10 update failed issue is to uninstall your WiFi drivers and then install the Windows Update. You need to download the Windows update first and uninstalling only the driver before going ahead with the installation process. Once the restart is complete, Windows will find your WiFi hardware and then install the stock drivers automatically. Also, you can update your WiFi drivers to the recent version by using the Device Manager.
- Tap Windows + R to launch the Run application. Write “devmgmt.msc” in the dialogue box search engine and click on Enter.
- When you are in the device manager, expand the section of “Network Adapters”.
- Spot the WiFi drivers from the list and then, right-click on it and then choose to uninstall.
- After the installation, install the update and examine whether the issue still persists or not.
Fix 7: Install the Windows by .iso File-
Although you can complete this process by installing the recent version of Windows by downloading the .iso File from the Website and shift it to the media so that your PC can boot and do the installation directly. However, make a note that this method is those users who already know the process of installation of a new copy of Windows obtained from the installation media. Therefore, keep a backup of all the data before moving ahead with the solution.
- Move to the Windows iso download website and download the recent version of the iso file present which built with Windows 10 1709 Creators Update.
- Finish downloading the .iso file. After that, make a bootable media.
- Now push the media into the computer and follow the guide in the tutorial provided about the installation of the clean version of Windows on your computer.
- Also, you can go through the basic guides about the installation of Windows 10 from scratch.
However, keep a backup of all the data before going ahead with the installation.
Fix 8: Disable the Internet Information Service-
This is an important solution to combat the Windows 10 Update failed to install issue. We all know about IIS, an extensible web server developed by Microsoft mainly for the Windows NT family. It is supportable to each and every internet protocol. Therefore, we will try our best to disable the service and examine if it can bring any sort of improvement to this problem.
- Firstly press Windows+S to introduce the search bar. Write “Windows Feature” in the dialogue box and open the first result from the drop-down list.
- On opening the new window, go through all the list till you find “Internet Information Services”. Click on the uncheck option.
- Restart your P.C to see the changes that take place and check whether the update is successful or not.
Fix 9: Reboot Your P.C multiple times-
One of the important solutions for the Feature Update to Windows 10 Version 1709 failed to install issue is to restart the P.C when it is encountered with errors. Then the update continues by detaching the internet to ensure that there was no internet compatibility between the updated client and the servers. Although, this can be counted as a trial and error sort of thing it worked for many users.
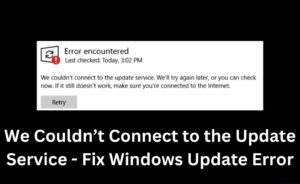
Fix 10: Turn on the Update Service-
Just turn on the Windows Update Service and start it again. This can be one of the effective solutions for the feature update to Windows 10 version 1709 failed to install issue. However, the update manager takes some time initially to evaluate the details and make a manifest for downloading.
- Firstly, open the Services tab. Move to the Windows Update tab and click on Properties.
- Also, start the service and start the update manager.
- Again, try updating it and inspect whether the problem still persists or not.
Endnotes-
We hope that we have given all the major solutions to overcome the feature update to Windows 10 version 1709 failed to install issue. You can refer to the user manual as a quick guide. However, you can get in touch with us for any urgent issues.